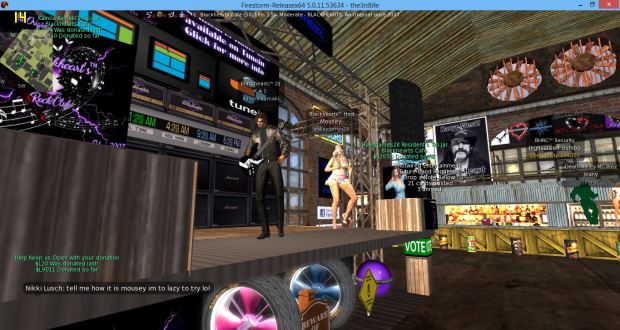
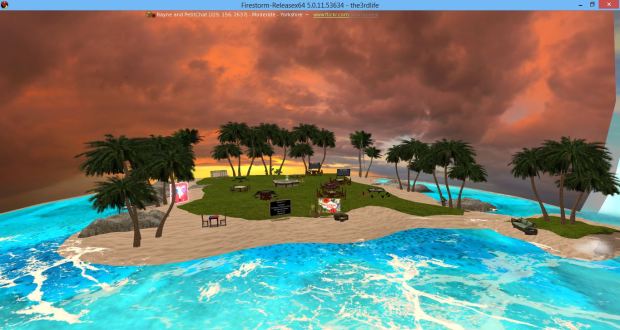
Creating Machinima was an exciting journey right from the beginning where you have select the location and think on the purpose why you really want to shoot that location and other factors. I began searching a proper location and in my two weeks i couldn’t find a perfect location which i was looking for. And after good amount of research on Google and Second Life i found Keys West Resort. It Really got me into because it has really great premium feel graphics and textures on each object creation.
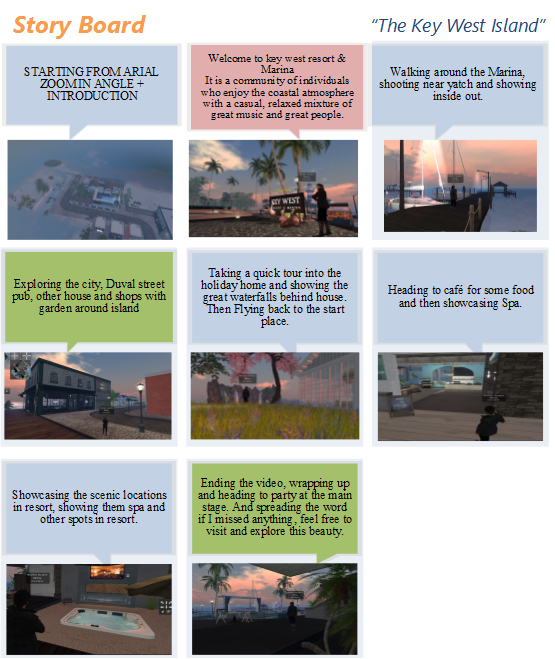
In my Third week, i started to explore the location more and finding out location, then writing my ideas on where i would like to get shots and what i want to reflect on my video, so i ended up creating a storyboard which explains my whole machinma concept and i found that really useful rather creating the machinima without any storyboarding or planning would have ended up into a random unguided video.
In the same week then i have created my video and started researching on how i would shot a video in Second Life as its a fairly new platform for us, getting those shots would be tough. So, i found good resources online and few of the sites has been reffered by Belma which included blog link of Strawberry Singh which was quite helpful. I learnt that how to shoot using various angles and using various hot keys to move the camera, hide all of your elements on the screen, etc.
In the process of recording, i have recorded plenty of videos, through different angles which resulted into Fraps recording 40GB’s of worth videos can you imagine. IT WAS INSANE!
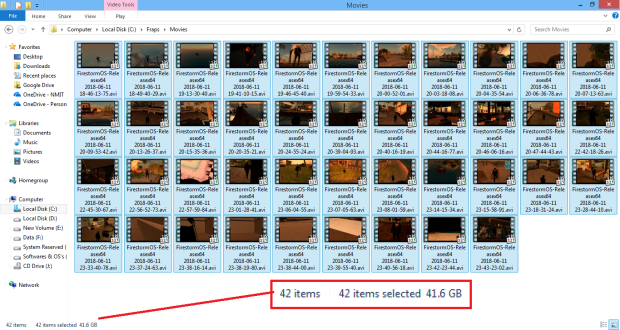
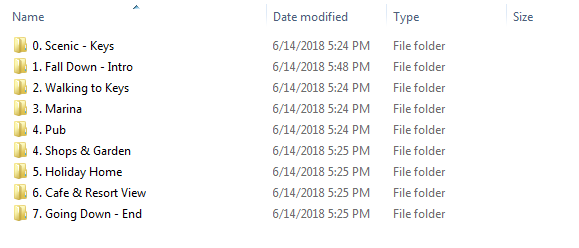
Fortunately, i had good amount of space on my HDD which handled this storage well. Later on i realised that if i don’t organise my videos and clear up the unnecessary shots properly then i would be lost in terms of editing. So, those videos ended up in their right folders:
Then i began to edit my files which took my most of the time, and Sound Designing as well; as music is my passion i wanted to make sure that the sounds goes really well with the final video. So that’s how the process went:

Using Adobe After Effects CC to edit the Machinima
While i was Shooting videos, i got really amazing ideas which ideas to adding various shots and adding sound effects onto my final video and user engagement by making the video more interactive with usage of various angles, moving camera at smart and fast pace. Showing them that location why it is great. So, shooted my videos on various angles and inserted special sound effects to my ideas in my final output.
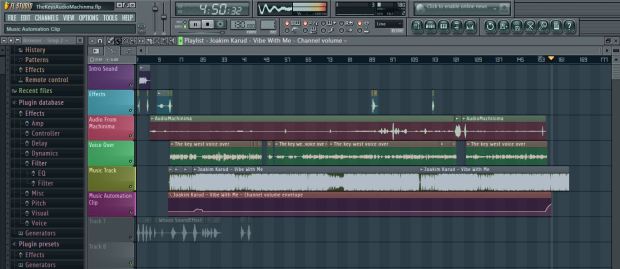
Designing the Audio clip, adding few effects, Amplifying and Mastering few clips in FL Studio
Here are the sound effects you may found in my final video which has been used very creatively and it’s hard to notice because the main important thing is it goes in flow with the video. and that is really important
Track used: Joakim Karud – Vibe with me which suits my voice, and gives positive vibes to video.
Met Requirements
In order to check that whether i do meet the machinima requirements basically i went to the course outline and ticked the appropriate:
- Between 3 and 5 minutes of publicly viewable machinima
- My video is 4:58 which is approximately 5mins
- Evidence of basic storyboarding of the machinima
- Provided in my previous blog post.
- A copy of the script (for actors if involved or voice over if used)
- Included in my blog post.
- Your video needs to:
- ✓ – Have a title
- ✓ – Have credits
- ✓ – Have audio added (over and above any recorded voice e.g. title sound track, credits sound track)
- ✓ – Be copyright appropriate
- ✓ – Be licensed appropriately
- ✓ – Have appropriate transitional effects (fade-in/out, zoom in/out)
- ✓ – Use multiple camera positions (Top to down, B-Roll, Ariel Shots and other angles)
- ✓ – Use appropriate camera movement
- ✓ – Be created in a reasonable definition for easy and clear viewing